Tuesday, May 21, 2013
Rice Cakes on the Road
I've really had good results cooking and preparing ride food from the Feed Zone Cookbook and Feed Zone Portables Cookbook. I've liked it so much that I've actually had issues going back to using packaged ride food when I'm doing a race or event on the road. I also have had people ask me what I do for ride food when I'm on the road to a cycling event.
Last month I decided to try to make Skratch Labs rice cakes from the Feed Zone Cookbook in a hotel room with what is easily available in a hotel. They turned out pretty good. I'm sure Allen and Biju can talk to some of the substitutions that I made. These are NOT nutritionally ideal, but for me they're a better choice than packaged alternatives like Power Bars or Clif Bars.
Ingredients
* Steamed rice from a Chinese restaurant,
* Peanut Butter -- little, single-serving tubs from the Breakfast Bar in the hotel (replaces egg) You could use egg from the breakfast bar if you have a fridge in your hotel room to keep them cold until you're able to procure rice.
* Soy sauce packets from the Chinese restaurant
* Brown Sugar from the oatmeal section of the breakfast bar.
* Pre-cooked bacon or beef jerky. Beef jerky is a bit chewy, but it works. Pre-cooked bacon is EXPENSIVE in the grocery store.
* Parmesan cheese packets from a take-out pizza place. Ask at the front desk if you don't want to order a pizza… My hotel had them. Check the expiration date on them… One of mine expired in 2009.
* Salt packets
* 1 gallon-sized ziplock bag to mix stuff up in. I thought about using the ice bucket, but I know what those have been used for in the past... Trust me, you don't want to do that. You could use the plastic liner bag that they usually give you for the ice bucket. I just usually have a ziplock or two with me.
* small sandwhich baggies in which to carry individual rice cakes.
I dumped the ingredients into a gallon zip lock bag and squished it all up instead of using a mixing bowl. I then used sandwich bags instead of fancy parchment paper to portion things out. Made them into portions about the size of a racquetball. They stuffed into jersey pockets or Revelate Feed Bags nicely. I usually have a sharp knife with me all the time. It is kind of weird dicing up beef jerky with a hunting knife while sitting on a hotel bed, but it worked.
Your hotel cleaning people will appreciate it if you're either VERY careful not to make a huge mess and/or you leave them a huge tip to clean up after you.
Hugs and Kisses,
Pete
Training for the Unknown
This probably belongs in one of my other blogs, but I'm going to put it here anyways.
I've become more of a distance rider than I was when I was a kid. I always loved long rides… my definition of "long" has just changed over the years. That's required me to adapt my training and preparation for events a bit more. The things that I'm going to talk about in this blog entry still apply to any ride that you define as long. Certainly if "long" means 200+ miles, you'll incorporate more of this into your workouts than you will if "long" means 60.
This year I've been preparing for Dirty Kanza 200… a self-supported 200 mile race on dirt roads around Emporia, Kansas. We don't find out the course until race day and have to navigate point to point using old-school methods (compass, map, cue sheet). Preparing for the unknown is something we all need to train for.
How do you train for something that you can't predict? Best way is to throw different stuff at your body and mind and then deal with them. For me training the mid is the most important part. If your mind is ready to deal with all kinds of stuff that you don't think you'll have to encounter, then the body just tends to follow suit. If you're narrow in your training focus, your mind may not be ready for something weird to happen. If your mind can't deal with it, then your body won't deal with well either.
Here's what I've worked with this spring:
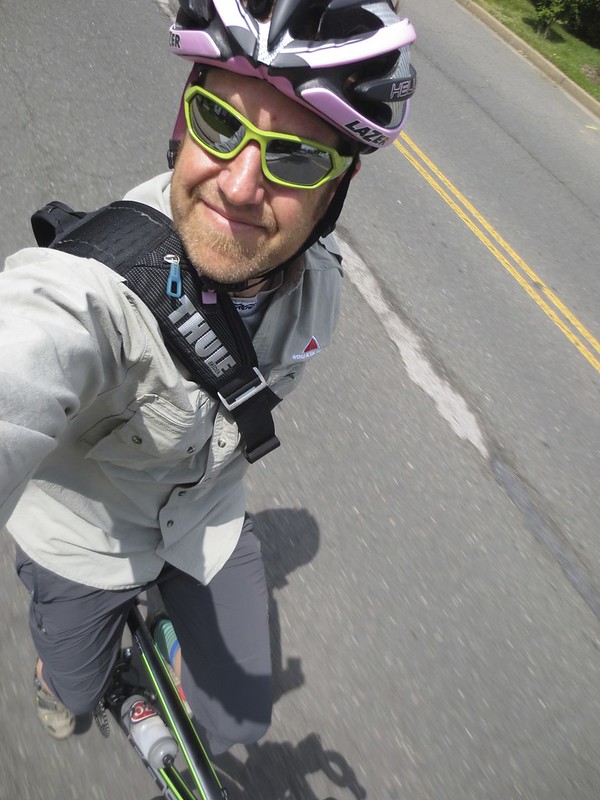
Heat: This is a big one. DK200 has been held in temps over 100 degrees with high humidity, but it is really pleasant here in Virginia these days. We've had only a few days that dip into the low 80s. Hard to acclimate to heat with that kid of weather. To deal with it, I've been wearing winter base layer, long sleeve jerseys, tights, wool socks and mid-weight gloves for some training rides. It makes me hydrate more and get used to sweating buckets. Basically I dress for temps in the mid 40s when it is really in the upper 70s.
Cold: This won't really be a factor for Dirty Kanza, but it might be for other things. Dressing for the 70s when it is really in the 40s needs to be done carefully. You can actually hurt yourself and cause joint problems by doing so. It does, however, teach your body to deal with cold to remove a layer for an hour in the middle of a ride and experience some cold. It really helps your mind deal with it too.
Wet: Again, be a little careful with this one. Practice riding in the rain without rain gear to get the feel for it. This time of year it often happens organically… we all get caught in unexpected rain storms now and then. Ride and enjoy it! My favorite rain riding quote comes from the author Terry Pratchett:
Mistress Weatherwax: "I prefer to get wet and be thankful"
Tiffany: "Thankful for what?"
Mistress Weatherwax: "That I'll be dry later."
Weight: Mostly I'm talking about the bike here. Practice riding with a heavy bike. It helps with climbing, wind and generally dealing with adversity. Ride with a pack or a heavy camelback. This can simulate wind since you have to put out a lot more power and everything feels sluggish. Getting on your light, lively bike after riding a heavy, loaded-down bike feels great too.
Wind: Never let a windy day go by without going out to play in it. Teaching your mind to enjoy punching holes in the wind is probably one of the hardest things to do. Wind can be the most mentally defeating thing to encounter when you're riding. You feel like you should be riding faster and with less effort. Your mind registers this and it is easy to let it sink your ride or race. Practice spending LOTS of time outside the draft. Go play on windy days. Ride a heavy bike. Ride a fixie. Ride a heavy fixie on a windy day. Don't forget crosswinds. They can really suck. Practice in them.
Hills: Practice hills of all kinds and they become less intimidating. If you suck as a climber then you need to practice more. Ride hills in the rain. Ride hills in the wind. Ride hills on your heavy bike, with a pack and/or on a fixie. Throw all kind of weird stuff at your body. If you have a hill that you hate, go back and do it a second time… or third.
Road Conditions: Smooth pavement is soooooo nice to ride on! That's why it is best to train on rough stuff. Ride crappy roads. Ride dirt roads. Ride crappy dirt roads. Ride single track on your cross bike… or fixie… or fixie cross bike. Learn how your bike handles in the wet or wind on crappy roads.
Mechanicals: This is a weird one. My friend Nick broke his derailleur part way into DK200 last year and rode almost 130 miles in one gear last year. He is a super bad-ass. He was able to do that because he trained his body and mind to deal with the weirdness. This year he's going back to race single speed class at DK200. He's freaking awesome. Gears are not the only thing that break. If you break a spoke, you might have to deal with a bent wheel that doesn't allow you to ride with one of your brakes. Be REALLY careful doing this, but you can simulate that. Loosen or disconnect your brake. Most brakes have some kind of quick release. Riding with no front or rear brake can be really dangerous. Learn what you have to do ride safely with only one brake. I know… that's a bit weird, but I do it!!! it helps be mentally prepared for things.
Weird Resupply Intervals: Dirty Kanza has checkpoints every 50 miles or so where we're able to get water/food from our support crew. What happens if you get lost and have to go 70 miles? 90? 100? You get the idea. Learn how to ride and conserve water and food. Learn how to ride carrying too much food and water. Learn how much is way too much. Practice this!!! I did a ride this spring where I went 130 miles on gravel and paved roads with no resupply at all… not water or food. I carried EVERYTHING for that ride. It sucked in many ways, but it taught me what to do and how to prepare.
I know this was kind of a weird conversation. The bottom line is that if you want to be prepared for everything, you need to teach your mind and body to adapt. If you prepare for the stuff above, you'll actually be ready for the things that I didn't list up there. I obviously can't list everything you'll encounter. If you train while thinking outside the box, you'll be ready for weird, fun stuff to happen. That's what doing long rides is all about!!!
Have fun and be safe!
Pete
I've become more of a distance rider than I was when I was a kid. I always loved long rides… my definition of "long" has just changed over the years. That's required me to adapt my training and preparation for events a bit more. The things that I'm going to talk about in this blog entry still apply to any ride that you define as long. Certainly if "long" means 200+ miles, you'll incorporate more of this into your workouts than you will if "long" means 60.
This year I've been preparing for Dirty Kanza 200… a self-supported 200 mile race on dirt roads around Emporia, Kansas. We don't find out the course until race day and have to navigate point to point using old-school methods (compass, map, cue sheet). Preparing for the unknown is something we all need to train for.
How do you train for something that you can't predict? Best way is to throw different stuff at your body and mind and then deal with them. For me training the mid is the most important part. If your mind is ready to deal with all kinds of stuff that you don't think you'll have to encounter, then the body just tends to follow suit. If you're narrow in your training focus, your mind may not be ready for something weird to happen. If your mind can't deal with it, then your body won't deal with well either.
Here's what I've worked with this spring:
Heat: This is a big one. DK200 has been held in temps over 100 degrees with high humidity, but it is really pleasant here in Virginia these days. We've had only a few days that dip into the low 80s. Hard to acclimate to heat with that kid of weather. To deal with it, I've been wearing winter base layer, long sleeve jerseys, tights, wool socks and mid-weight gloves for some training rides. It makes me hydrate more and get used to sweating buckets. Basically I dress for temps in the mid 40s when it is really in the upper 70s.
Long sleeves and wool socks on an 85 degree day.
Cold: This won't really be a factor for Dirty Kanza, but it might be for other things. Dressing for the 70s when it is really in the 40s needs to be done carefully. You can actually hurt yourself and cause joint problems by doing so. It does, however, teach your body to deal with cold to remove a layer for an hour in the middle of a ride and experience some cold. It really helps your mind deal with it too.
Wet: Again, be a little careful with this one. Practice riding in the rain without rain gear to get the feel for it. This time of year it often happens organically… we all get caught in unexpected rain storms now and then. Ride and enjoy it! My favorite rain riding quote comes from the author Terry Pratchett:
Mistress Weatherwax: "I prefer to get wet and be thankful"
Tiffany: "Thankful for what?"
Mistress Weatherwax: "That I'll be dry later."
Weight: Mostly I'm talking about the bike here. Practice riding with a heavy bike. It helps with climbing, wind and generally dealing with adversity. Ride with a pack or a heavy camelback. This can simulate wind since you have to put out a lot more power and everything feels sluggish. Getting on your light, lively bike after riding a heavy, loaded-down bike feels great too.
Wind: Never let a windy day go by without going out to play in it. Teaching your mind to enjoy punching holes in the wind is probably one of the hardest things to do. Wind can be the most mentally defeating thing to encounter when you're riding. You feel like you should be riding faster and with less effort. Your mind registers this and it is easy to let it sink your ride or race. Practice spending LOTS of time outside the draft. Go play on windy days. Ride a heavy bike. Ride a fixie. Ride a heavy fixie on a windy day. Don't forget crosswinds. They can really suck. Practice in them.
Hills: Practice hills of all kinds and they become less intimidating. If you suck as a climber then you need to practice more. Ride hills in the rain. Ride hills in the wind. Ride hills on your heavy bike, with a pack and/or on a fixie. Throw all kind of weird stuff at your body. If you have a hill that you hate, go back and do it a second time… or third.
Road Conditions: Smooth pavement is soooooo nice to ride on! That's why it is best to train on rough stuff. Ride crappy roads. Ride dirt roads. Ride crappy dirt roads. Ride single track on your cross bike… or fixie… or fixie cross bike. Learn how your bike handles in the wet or wind on crappy roads.
Mechanicals: This is a weird one. My friend Nick broke his derailleur part way into DK200 last year and rode almost 130 miles in one gear last year. He is a super bad-ass. He was able to do that because he trained his body and mind to deal with the weirdness. This year he's going back to race single speed class at DK200. He's freaking awesome. Gears are not the only thing that break. If you break a spoke, you might have to deal with a bent wheel that doesn't allow you to ride with one of your brakes. Be REALLY careful doing this, but you can simulate that. Loosen or disconnect your brake. Most brakes have some kind of quick release. Riding with no front or rear brake can be really dangerous. Learn what you have to do ride safely with only one brake. I know… that's a bit weird, but I do it!!! it helps be mentally prepared for things.
Weird Resupply Intervals: Dirty Kanza has checkpoints every 50 miles or so where we're able to get water/food from our support crew. What happens if you get lost and have to go 70 miles? 90? 100? You get the idea. Learn how to ride and conserve water and food. Learn how to ride carrying too much food and water. Learn how much is way too much. Practice this!!! I did a ride this spring where I went 130 miles on gravel and paved roads with no resupply at all… not water or food. I carried EVERYTHING for that ride. It sucked in many ways, but it taught me what to do and how to prepare.
I know this was kind of a weird conversation. The bottom line is that if you want to be prepared for everything, you need to teach your mind and body to adapt. If you prepare for the stuff above, you'll actually be ready for the things that I didn't list up there. I obviously can't list everything you'll encounter. If you train while thinking outside the box, you'll be ready for weird, fun stuff to happen. That's what doing long rides is all about!!!
Have fun and be safe!
Pete
Thursday, May 16, 2013
On-Bike Photography
I've had a lot of questions on how I take photographs while I'm riding. I said I'd put something together to talk about it. I've been photographing things while riding for almost 40 years. I've shot with everything from medium format film and 35mm to digital SLRs and Point and shoot cameras. I've had a dozen different kinds of rigs for carrying the camera. I've got a few things that work well for me.
My camera: These days I shoot with an inexpensive point and shoot. I don't want to spend a ton of money on a camera. I tend to be hard on cameras, so I go cheap. My current camera is a Canon Powershot Elph 320. It is a 16mp camera with a few features I use a lot. It is small, durable and pink. Best of all, I got it for $70. I hate the touch screen. I leave it locked almost all the time. I'll be happy when it breaks.
What features do I like? Biggest for me is that there are simple, non-fiddly ways of accessing the controls on the camera so I don't have to look at it in order to turn it on, change settings and shoot. My eyes and attention needs to be on where I'm riding rather than fiddling with the camera. I change all the settings on the camera by feel rather than by site. The best camera I ever used was the Canon Powershot S100. It was AWESOME, but it wasn't perfect. The jog dial was great for adjusting exposure on the fly, but it required that I look at the camera to see if I'd changed a setting. I couldn't do it by feel.
I like shooting with a cheaper camera. The photos are not as spectacular, but I worry much less about the camera, so I'm more brave when shooting and get much better photos as a result. I am not worrying about destroying a $70 camera near as much as I am a $400 one. Don't get me wrong... I love shooting with great cameras. I just am much more reserved in how I shoot and that is somewhat limiting for me. If I'm shooting like Evel Kneivel, I want to be carrying a cheap, durable camera.
How do I set up the camera?
Holding the camera is important. I put skateboard grip tape on every flat surface that my hand touches. Fully 1/4 of my camera is covered in grip tape. 4 of the 6 sides of the camera have grip tape on them. Cameras are slippery. Doing this reduces the chance that you'll drop your camera.
Settings: leave the camera in Program mode with burst set. Auto ISO and Auto White Balance. The first month I have the camera, I figure out if I need to adjust the exposure before I shoot. My current Canon meters the photos with a little too much light, so I dial back the exposure 1/3 or so to compensate. I like the camera because it has a switch with two settings… one for full auto and one for program. If I know I need a fill flash, I set it for full auto (which I set to always fire the flash). That gives me a way to turn flash on and off with the touch of a finger… I don't have to look.
If light is going to be consistent during the ride, I may switch to Aperture Priority mode and set it to the sweet spot for the lens. F8 is pretty good for the little camera that I've got. That gives me a little different kind of shot than letting the computer figure everything out.
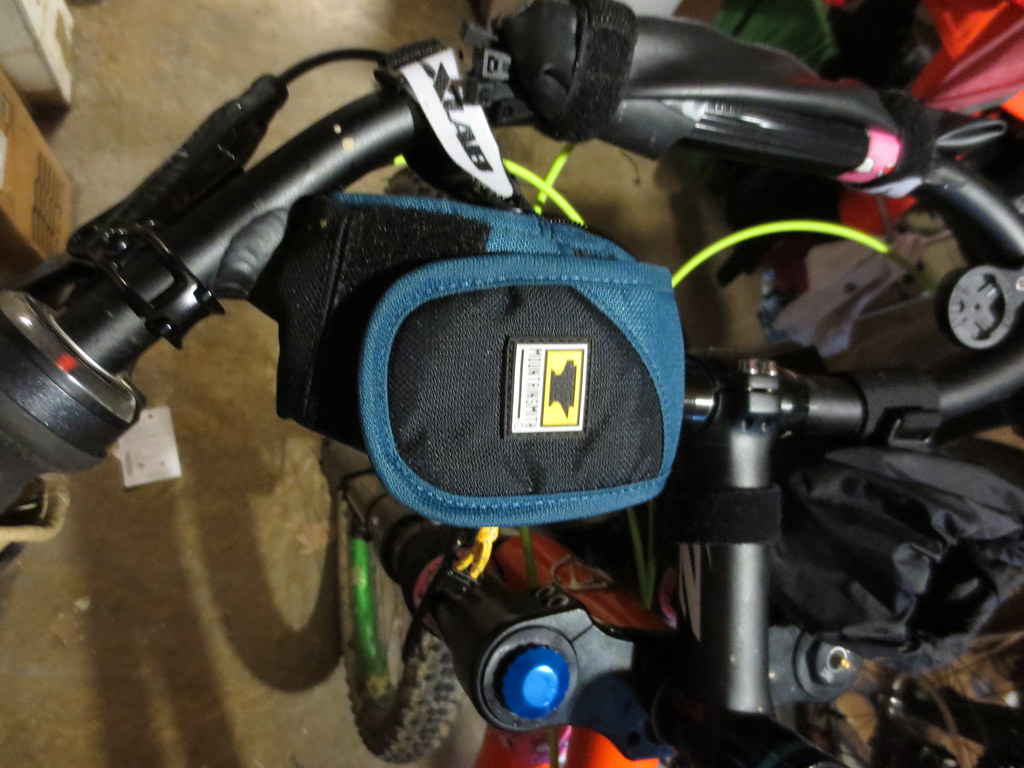
How do I carry it? I have a small camera bag that I attach to the handlebars or head tube of the bike. It has a velcro flap that completely covers the camera and keeps sweat, mud and light rain off when the camera is stowed. My favorite is the Mountainsmith Cyber II Camera Case. I not only velcro it to the bars, but I also either zip tie or velcro one of the D-rings to the bars. I've had the main velcro straps fail on bumpy trails.
On rainy days, I usually put the camera in a waterproof pocket on my rain jacket. All of my rain gear has waterproof pockets on them. They're not perfect, but my cameras are tough enough that they can get a bit moist.
Sweat is something you want to avoid getting in your camera. If your name is Sean Chisham, buy the toughest waterproof camera you can, completely baby it and replace it every year. You're gonna kill the dang thing, so shoot a lot before it dies. ;)
Using the camera while rolling: Step 1: slip my hand into the camera lanyard. Step 2: remove camera from case. Step 3: turn it on. Step 4: Shoot. Step 5: Turn camera off. Step 6: Stow camera. Step 7: Remove hand from camera lanyard. The camera is attached to my wrist the entire time it is out of the case. It is much less likely to get dropped.
Framing the photo: Use burst mode! Play with it. Shoot from down low. Shoot from up high. Try to avoid weird backgrounds. Try to include weird backgrounds. Get people making funny faces while eating. Take photos of yourself. Shoot forward, backward, up, down, sideways. If there was a way to shoot inside out, I probably would try that. Use burst mode! Throw away 99% of your photos.
Buy this book and read the chapters on composition. Learn the 7 rules and practice them. You will become a much better photographer. http://www.amazon.com/Kodak-Guide-35mm-Photography-Techniques/dp/087985801X Who cares if it is about 35mm photography. Read it. You'll learn about light, aperture, shutter, composition... etc. You'll stop taking snapshots and you'll start taking photographs.
PRACTICE PRACTICE PRACTICE!! Play. Have fun. Find your eye. Practice one kind of photo for a while until you figure it out and get good at it. Then move on and try something different until you get good at that. Shoot EVERY DAY!!! Use burst mode. SHOT EVERY DAY! Join a photo group that pushes you and inspires you. Bike180 on Flickr is a good choice. SHOOT EVERY DAY!!!
Please let me know if you have questions or if there's something that works well for you.
Hugs and kisses
Pete
My camera: These days I shoot with an inexpensive point and shoot. I don't want to spend a ton of money on a camera. I tend to be hard on cameras, so I go cheap. My current camera is a Canon Powershot Elph 320. It is a 16mp camera with a few features I use a lot. It is small, durable and pink. Best of all, I got it for $70. I hate the touch screen. I leave it locked almost all the time. I'll be happy when it breaks.
What features do I like? Biggest for me is that there are simple, non-fiddly ways of accessing the controls on the camera so I don't have to look at it in order to turn it on, change settings and shoot. My eyes and attention needs to be on where I'm riding rather than fiddling with the camera. I change all the settings on the camera by feel rather than by site. The best camera I ever used was the Canon Powershot S100. It was AWESOME, but it wasn't perfect. The jog dial was great for adjusting exposure on the fly, but it required that I look at the camera to see if I'd changed a setting. I couldn't do it by feel.
I like shooting with a cheaper camera. The photos are not as spectacular, but I worry much less about the camera, so I'm more brave when shooting and get much better photos as a result. I am not worrying about destroying a $70 camera near as much as I am a $400 one. Don't get me wrong... I love shooting with great cameras. I just am much more reserved in how I shoot and that is somewhat limiting for me. If I'm shooting like Evel Kneivel, I want to be carrying a cheap, durable camera.
How do I set up the camera?
Holding the camera is important. I put skateboard grip tape on every flat surface that my hand touches. Fully 1/4 of my camera is covered in grip tape. 4 of the 6 sides of the camera have grip tape on them. Cameras are slippery. Doing this reduces the chance that you'll drop your camera.
Settings: leave the camera in Program mode with burst set. Auto ISO and Auto White Balance. The first month I have the camera, I figure out if I need to adjust the exposure before I shoot. My current Canon meters the photos with a little too much light, so I dial back the exposure 1/3 or so to compensate. I like the camera because it has a switch with two settings… one for full auto and one for program. If I know I need a fill flash, I set it for full auto (which I set to always fire the flash). That gives me a way to turn flash on and off with the touch of a finger… I don't have to look.
If light is going to be consistent during the ride, I may switch to Aperture Priority mode and set it to the sweet spot for the lens. F8 is pretty good for the little camera that I've got. That gives me a little different kind of shot than letting the computer figure everything out.
How do I carry it? I have a small camera bag that I attach to the handlebars or head tube of the bike. It has a velcro flap that completely covers the camera and keeps sweat, mud and light rain off when the camera is stowed. My favorite is the Mountainsmith Cyber II Camera Case. I not only velcro it to the bars, but I also either zip tie or velcro one of the D-rings to the bars. I've had the main velcro straps fail on bumpy trails.
Camera bag on the bars of the tandem
On rainy days, I usually put the camera in a waterproof pocket on my rain jacket. All of my rain gear has waterproof pockets on them. They're not perfect, but my cameras are tough enough that they can get a bit moist.
Sweat is something you want to avoid getting in your camera. If your name is Sean Chisham, buy the toughest waterproof camera you can, completely baby it and replace it every year. You're gonna kill the dang thing, so shoot a lot before it dies. ;)
Using the camera while rolling: Step 1: slip my hand into the camera lanyard. Step 2: remove camera from case. Step 3: turn it on. Step 4: Shoot. Step 5: Turn camera off. Step 6: Stow camera. Step 7: Remove hand from camera lanyard. The camera is attached to my wrist the entire time it is out of the case. It is much less likely to get dropped.
Framing the photo: Use burst mode! Play with it. Shoot from down low. Shoot from up high. Try to avoid weird backgrounds. Try to include weird backgrounds. Get people making funny faces while eating. Take photos of yourself. Shoot forward, backward, up, down, sideways. If there was a way to shoot inside out, I probably would try that. Use burst mode! Throw away 99% of your photos.
Buy this book and read the chapters on composition. Learn the 7 rules and practice them. You will become a much better photographer. http://www.amazon.com/Kodak-Guide-35mm-Photography-Techniques/dp/087985801X Who cares if it is about 35mm photography. Read it. You'll learn about light, aperture, shutter, composition... etc. You'll stop taking snapshots and you'll start taking photographs.
PRACTICE PRACTICE PRACTICE!! Play. Have fun. Find your eye. Practice one kind of photo for a while until you figure it out and get good at it. Then move on and try something different until you get good at that. Shoot EVERY DAY!!! Use burst mode. SHOT EVERY DAY! Join a photo group that pushes you and inspires you. Bike180 on Flickr is a good choice. SHOOT EVERY DAY!!!
Please let me know if you have questions or if there's something that works well for you.
Hugs and kisses
Pete
Subscribe to:
Posts (Atom)